Classic Canadian Butter Tarts with Flaky Pastry and Gooey, Caramelized Filling
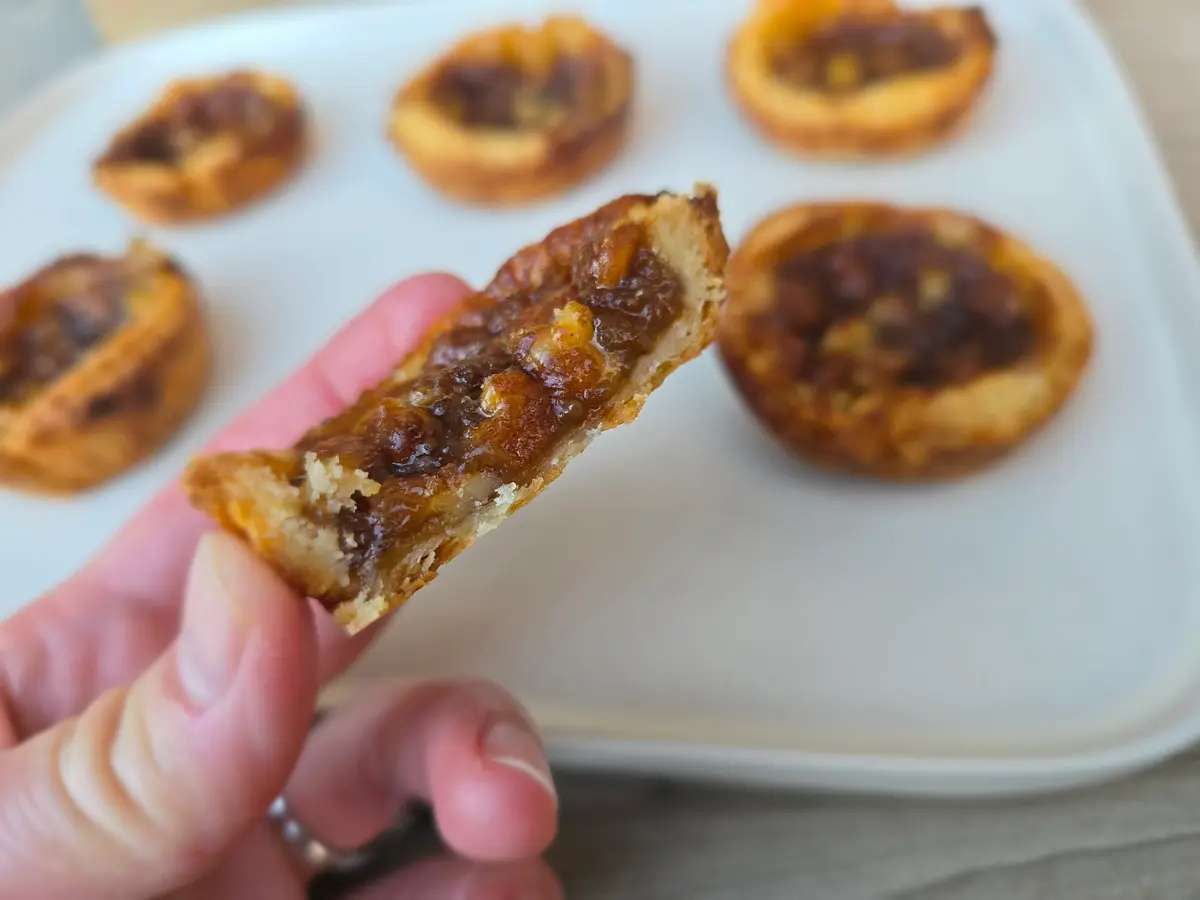
Canadian butter tarts are a beloved holiday classic and a nostalgic favourite for many. For my husband, these gooey, sweet treats bring back cherished memories of childhood, when butter tarts made their appearance as a special treat during family gatherings.
Canadian butter tarts are a beloved holiday classic and a nostalgic favourite for many. For my husband, these gooey, sweet treats bring back cherished memories of childhood, when butter tarts made their appearance as a special treat during family gatherings. This recipe combines a flaky, homemade crust with a rich filling that's both sweet and slightly tangy—perfectly balancing tradition with a modern touch.
In crafting this recipe, I wanted to ensure each component was just right, from the delicate crust to the syrupy, caramel-like filling. Butter tarts have always been known for their simplicity and charm.
Mga Sangkap
- For the Crust
- 225 g all-purpose flour
- 13 g sugar
- 5 ml kosher salt
- 2 sticks cold unsalted butter, cubed into 1/2 inch cubes
- 1 egg yolk
- 5 ml vinegar
- 120 ml Ice water to fill up to
- For the Filling
- 147 g packed brown sugar
- 79 g maple syrup, corn syrup or golden syrup (I suggest half maple syrup and half golden syrup)
- 57 g unsalted butter, softened
- 1 large egg
- 27 g dried currants or pecans
- 5 ml vanilla extract
- 3 g fine salt
- 5 ml of lemon juice or vinegar, optional
- 3 ml rum extract, optional
Mga Tagubilin
Pastry Dough
1In a 1/2 cup (120ml) measuring cup, add the egg yolk and vinegar, then top with ice water to measure 1/2 cup (120ml). Keep it in the fridge while you prepare everything else, as you want to ensure all the ingredients are chilled.
- 2
Combine the flour, sugar, salt, and butter in a stand mixer bowl.
- 3
Mix on low until large, fluffy crumbs form. Slowly add the water mixture.
- 4
Transfer the dough to a lightly floured work surface and fold it gently over itself 2–3 times to add more flakiness. Divide into two portions. While you are rolling half of your dough, keep the other half in the fridge. Roll the dough 4–5mm thick, which is slightly thicker than 1/8 inch (3mm). 1/4 inch (6mm) is just too thick, but 1/8 inch (3mm) will burn—so aim somewhere in between. Flour your work surface and rolling pin as needed to prevent sticking. Transfer to a large baking sheet, gently cover with plastic wrap, and refrigerate for at least an hour. Repeat with the remaining dough.
- 5
Using a 4-inch (10cm) round cookie cutter, cut out 12–16 dough circles. Reroll the scraps if necessary to maximize the dough. I find that each portion of the dough gives me 6 4-inch (10cm) circles, for a total of 12. When I reroll the scraps, I can get about 4 more circles. Gently press each circle into a standard muffin tin, ensuring the dough edges are flush with the top of the cups. Refrigerate for at least 2 hours, then prepare the filling near the end of the refrigeration.
Filling
6Soak the currants in hot water, then drain.
- 7
Combine the sugar, salt, butter, vanilla, syrup (maple syrup, corn syrup, or golden syrup), and egg by gently mixing with a whisk by hand.
- 8
If desired, add 1 teaspoon (5ml) of lemon juice or vinegar for a subtle tang that balances the sweetness. Also add 1/2 tsp (2.5ml) of rum extract, if desired, for more complexity.
Assembly and Baking
9Divide the currants and filling into the chilled tart shells. Do not fill each tart more than halfway as it will overflow!
- 10
Bake at 425°F (220°C) for 14 minutes, then reduce the oven to 400°F (200°C) and bake for another 3–4 minutes until the tarts are golden brown, bubbling, and set.
- 11
Let cool completely before removing from the tin.
FAQ
Na-try mo ba ang resipe na ito?
Mag-iwan ng star rating — nakakatulong ito sa ibang nagluluto na mahanap ito!
Mga Komento


Naghahanap pa? I-explore ang buong koleksyon — i-filter ayon sa lifestyle, cuisine, o dietary needs.